Book a demo
Setting up your social media accounts in the Social Planner

Kaili Wardlaw
Oct 20, 2022
7 Min Read

Social Planner gives you the ability to add all your fan pages to publish posts and engage with your Facebook audience through a Facebook Page.
Facebook Page Publishing Setup Guide
Following the steps below, you will be able to connect your Facebook pages with the platform.
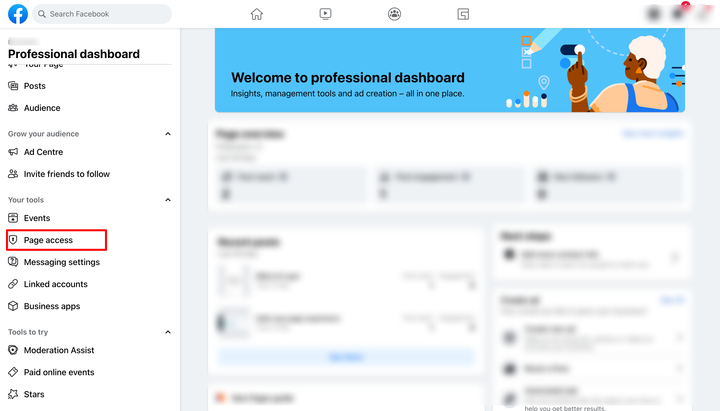
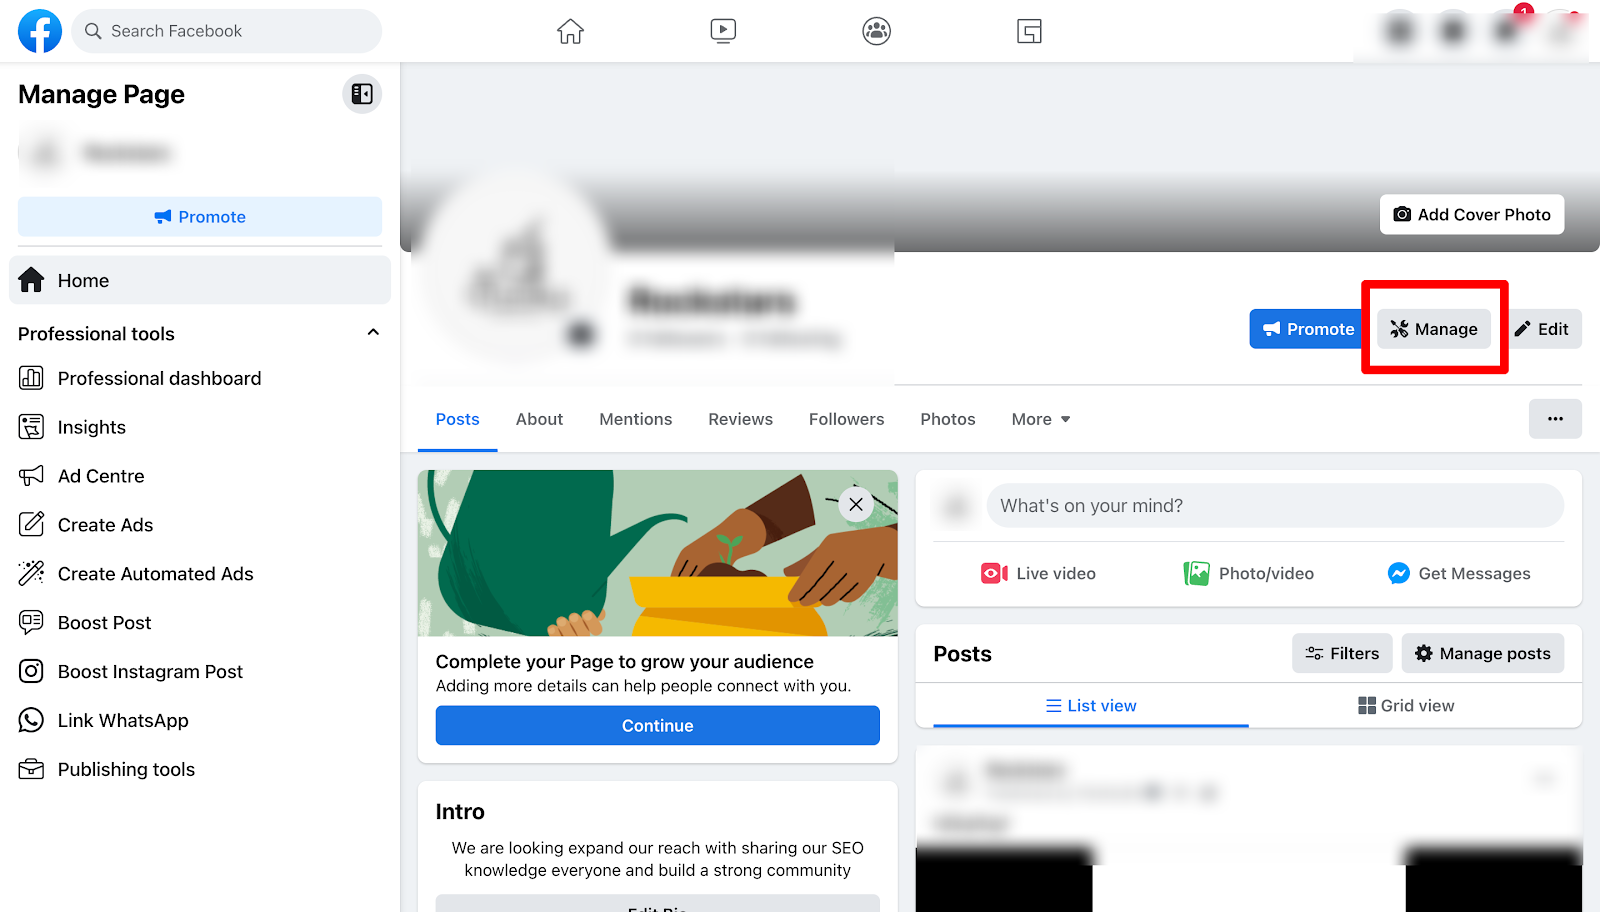
1. If you have already connected your Facebook pages from any profile previously and want to add some new pages, you will have to ‘Remove’ the application from your Facebook Settings > Business Integration section on your Facebook account and follow the steps below all over again as demonstrated in the image below.
2. To add all your Facebook pages, it is necessary that you have Admin rights. It is mandatory for you to log yourself in with the same profile that has all the pages in which you are an admin.
Due to Facebook’s recent API changes, it will no longer promote posting to Facebook personal profiles, however, you can add pages from different profiles for Social Planner.
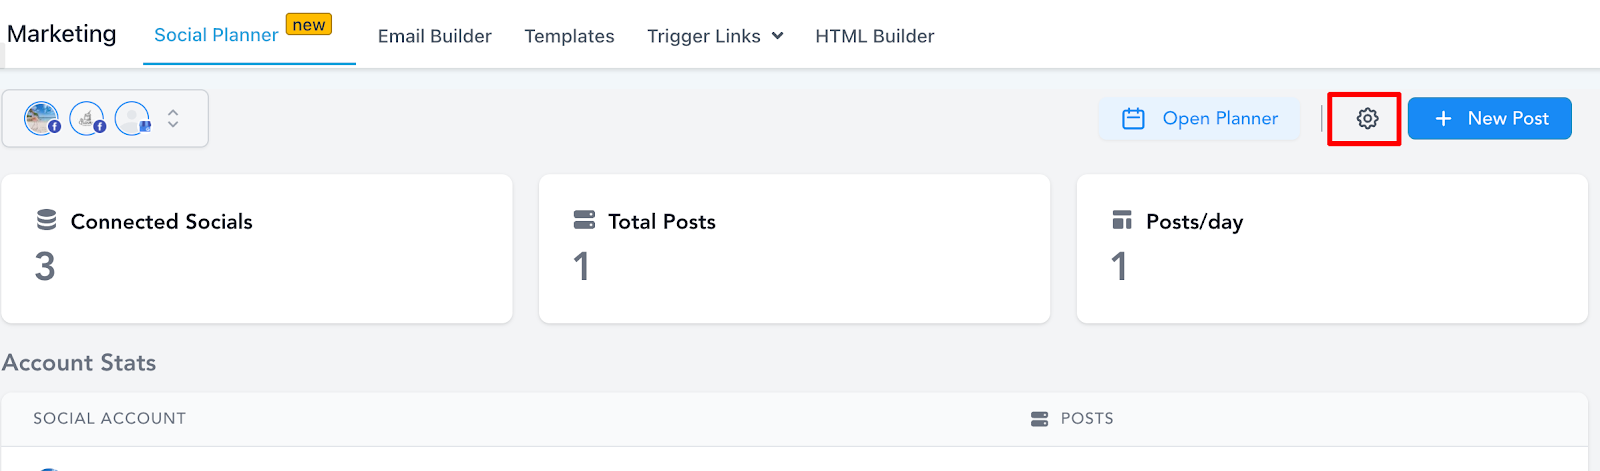
Step 1. Go to Social Planner > Setting
To get started, please go to Social Planner. In the top right corner of Social Planner, there is a Setting option (Gear icon). Please navigate to Settings by clicking it.

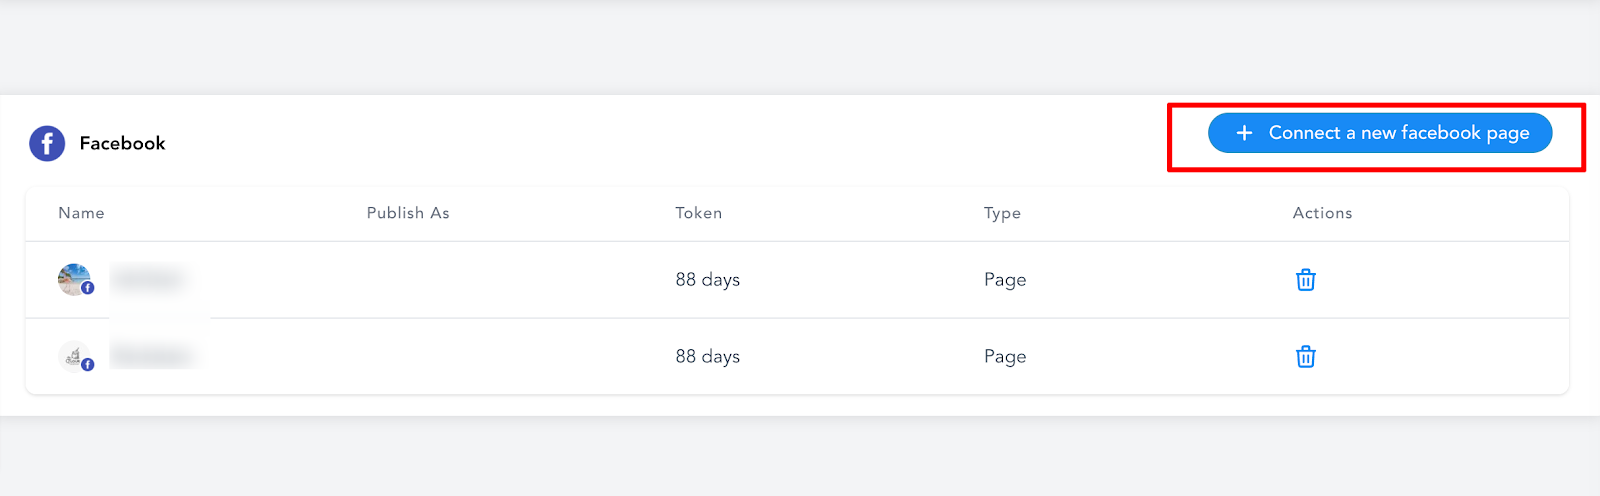
Step 2. Click on Connect a new page, Facebook Page
The next step is to click on Connect a new Facebook page of the table as shown below to manage multiple Facebook Pages.
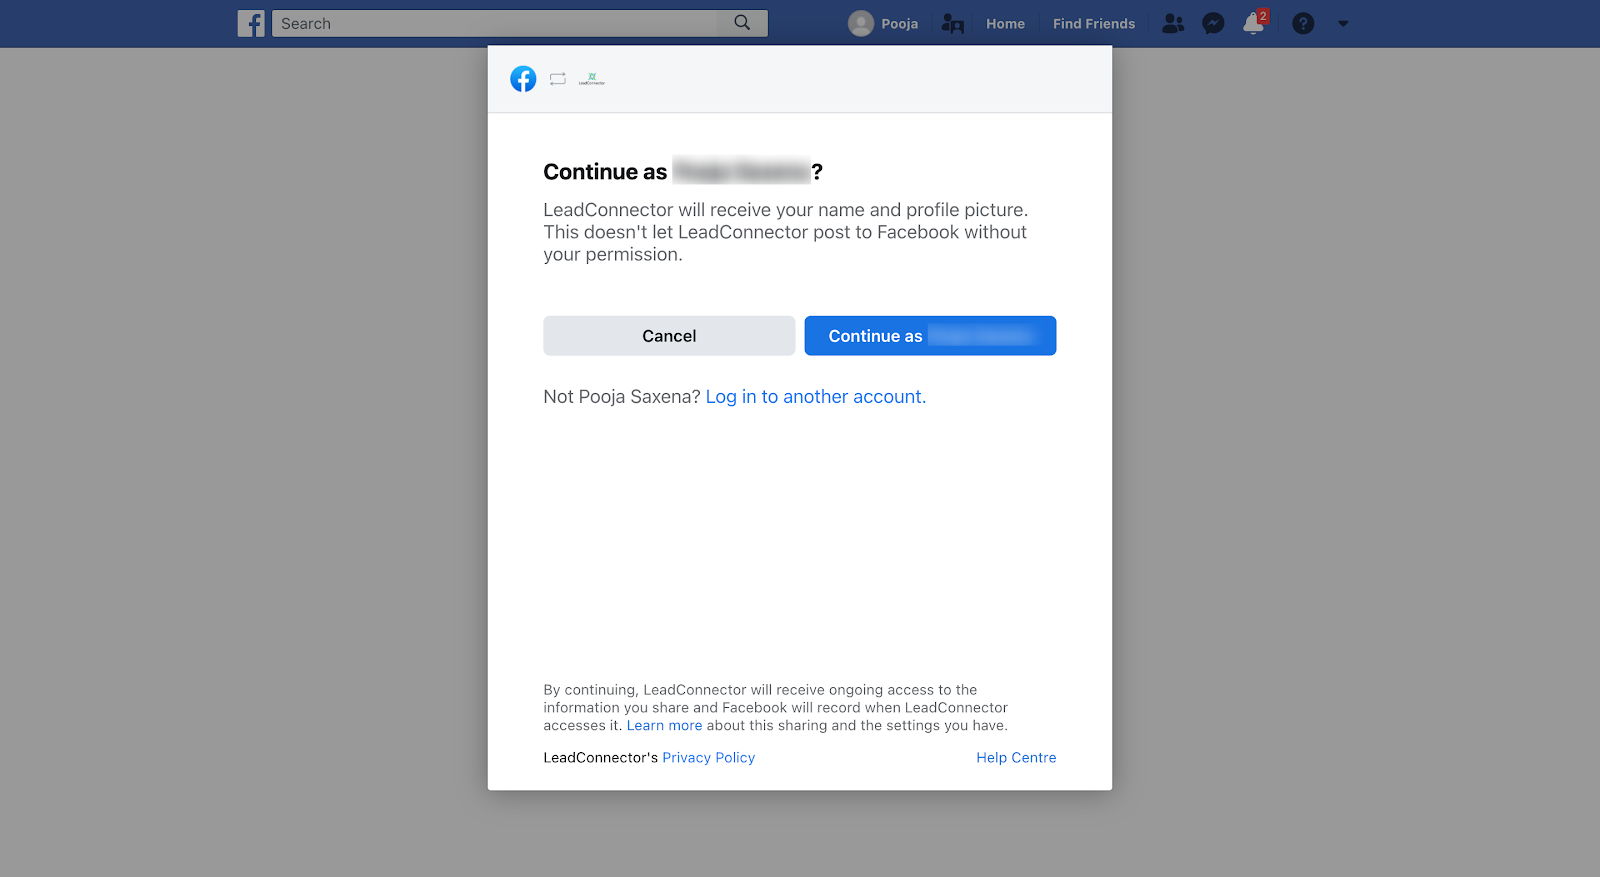
Step 3. Give permissions to fetch Facebook page(s)
If you’re connecting any profile for the first time, you will have to make sure you give all the permissions to it. Please click Continue to complete the authorization process for fetching the Facebook page(s).
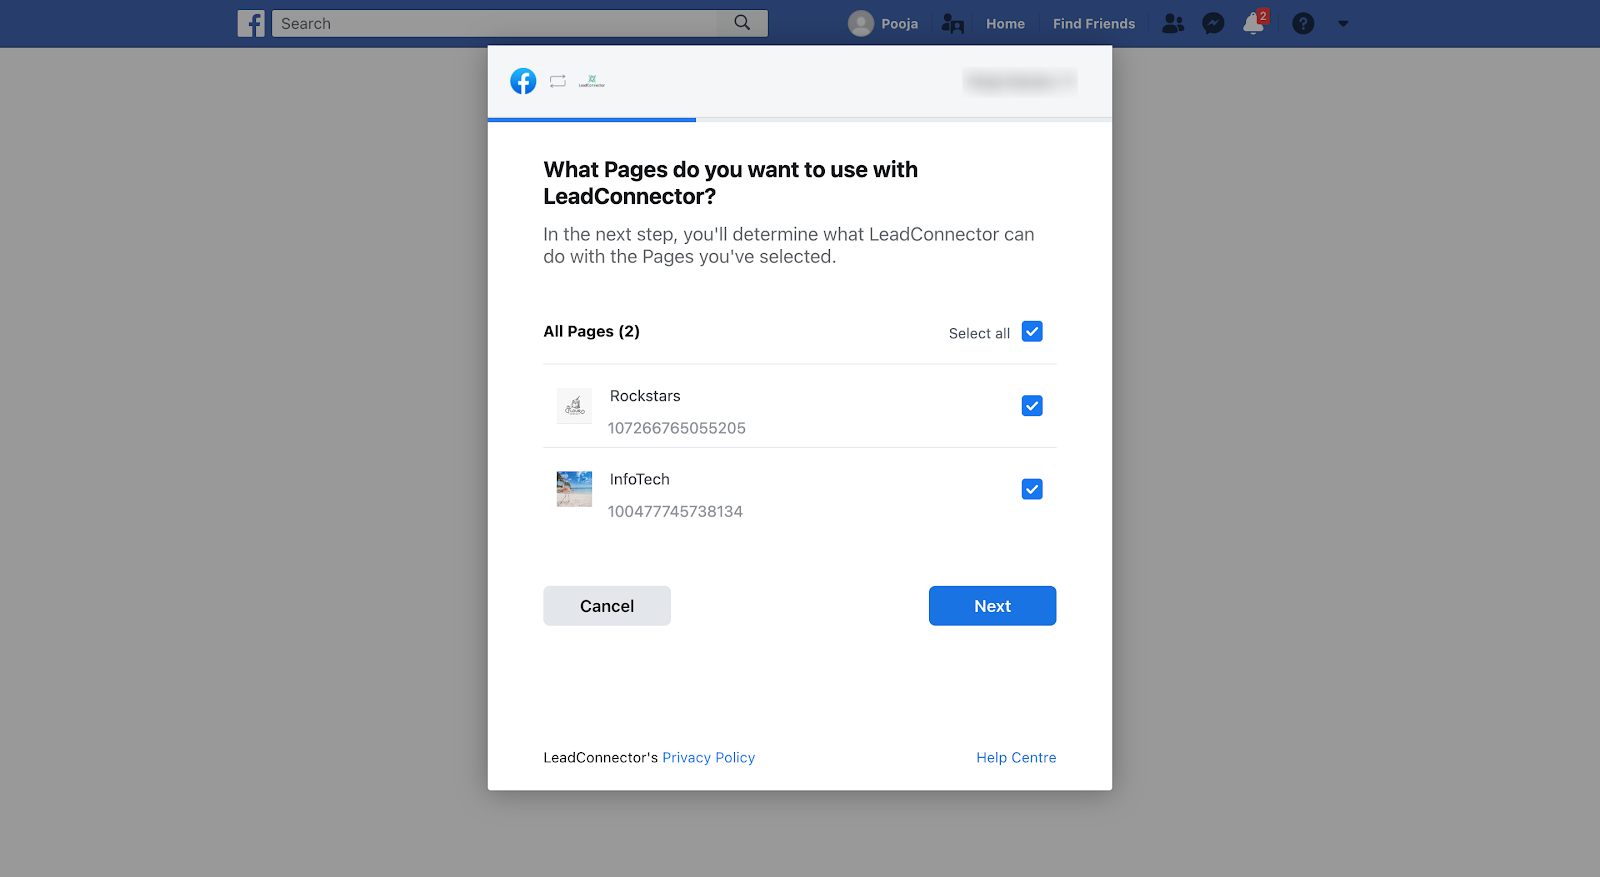
Step 4. Select Facebook Page(s) to connect
It will list all the Facebook pages for this profile, select the list of the ones you wish to connect for Social Planner.
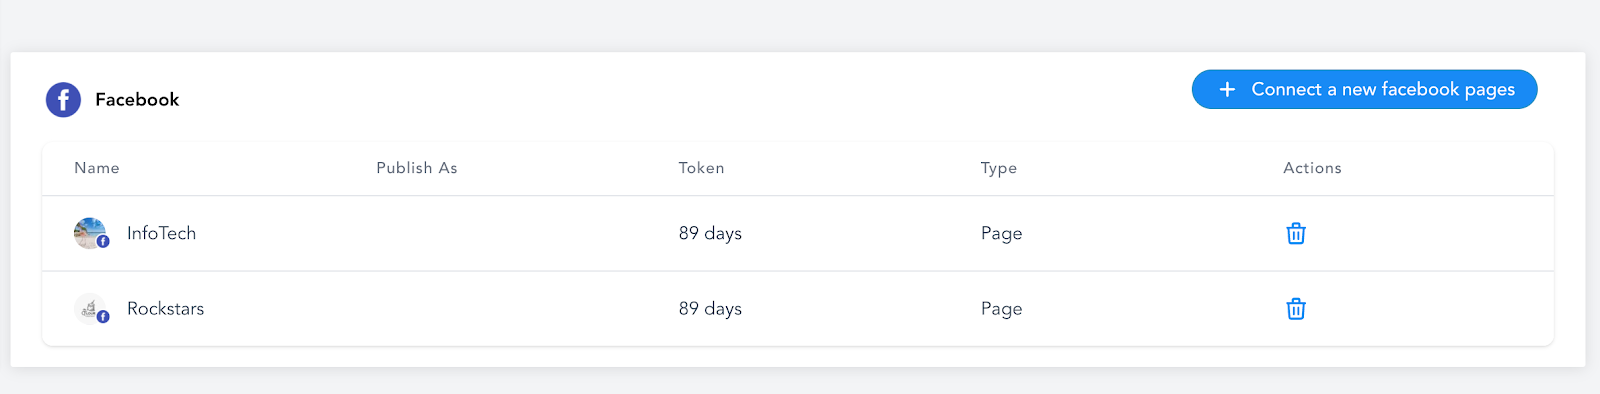
Step 5. Verify your connection
Last but not least, all of the selected pages in the previous step will be listed down showing a successful connection; as shown in the image below.
Following these instructions, you can add as many pages as you wish from the same or different Facebook profiles.


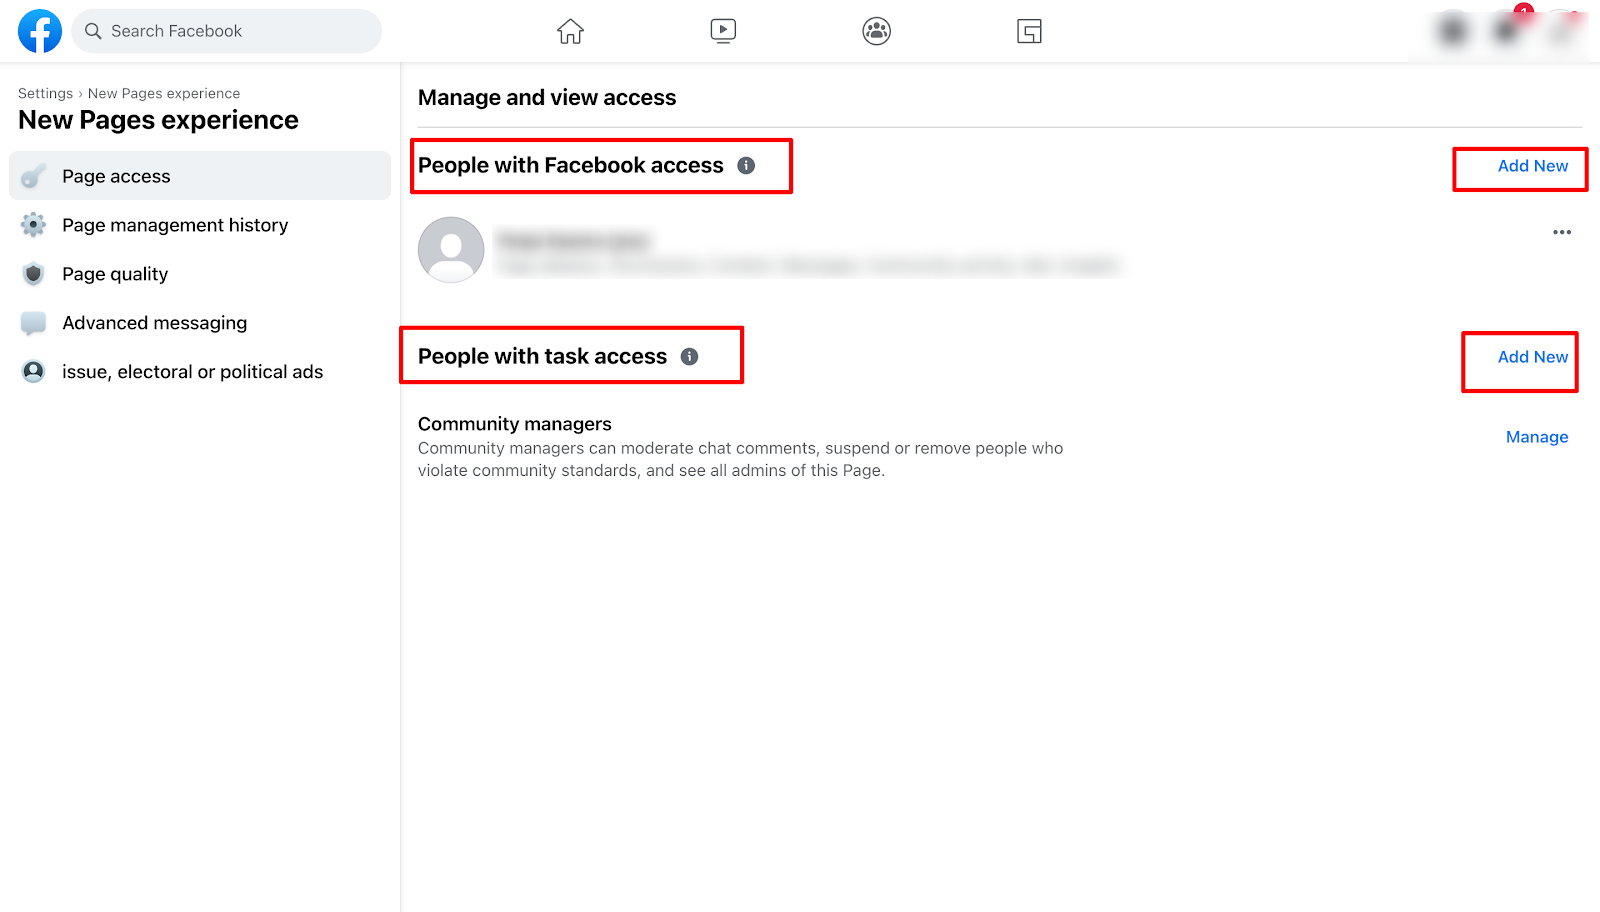
Facebook has two types of Pages – Classic and New Page experience. If you are using the Classic page, please follow the above flow. If you are using New Page Experience, they will be required to add access to the following role:
How to connect to your LinkedIn Profile(s) and Page(s)?
Step 1: The first step is to log into account and go to the Marketing, click on the Social Planner.

Step 2: On Visiting Social Planner, there will be an wizard with connect option or after visiting the overview of Social Planner will have a Setting option (gear icon)

Step 3: After clicking Add LinkedIn Profile/Page(s), there will be an option to add them.
[NOTE] Make sure that your personal LinkedIn account is a Super admin of the Page you want to add to Social Planner.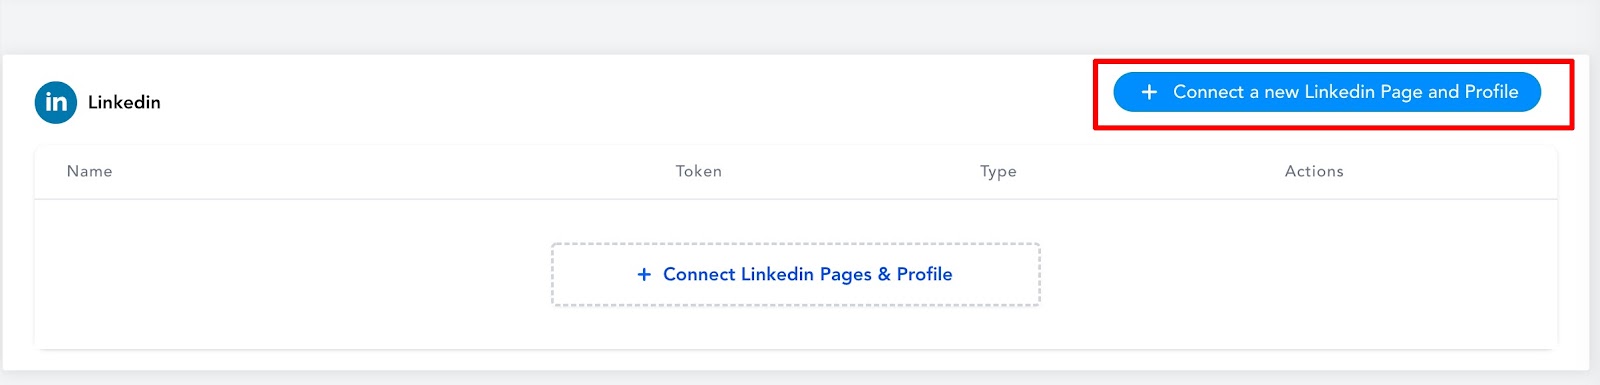
Step 4: If you are connecting it first time inside Social Planner, you will required to provide the permissions for social planner.

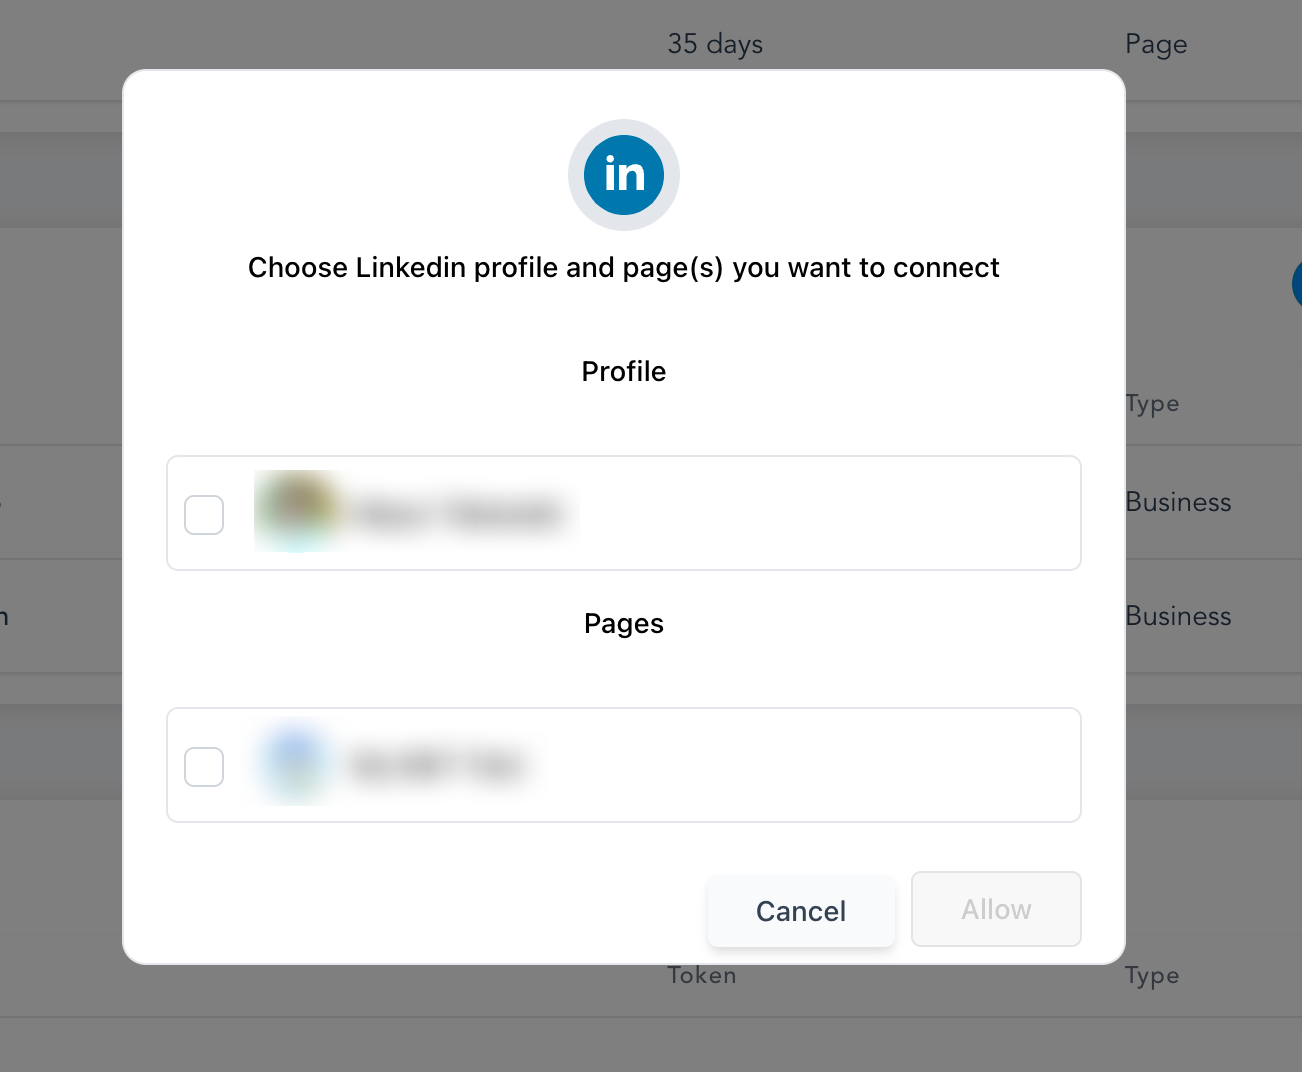
Step 5: Next step is to choose the LinkedIn Profile and Page(s) for social planner
Step 6: You can manage the accounts from the Setting Icon
How to connect Instagram Business account with Social Planner
[NOTE] If you have not converted your Instagram personal profile to a business profile. You need to perform the below mentioned two steps:- How to make an Instagram profile into a business account
- How to connect an Instagram business account with your Facebook account
Step 1: Go to Social Planner > Setting
The first step is to navigate to Marketing, and click on the Social Planner.
On Visiting Social Planner, there will be a wizard with connect option, or after visiting the overview of Social Planner will have a Setting option (gear icon)

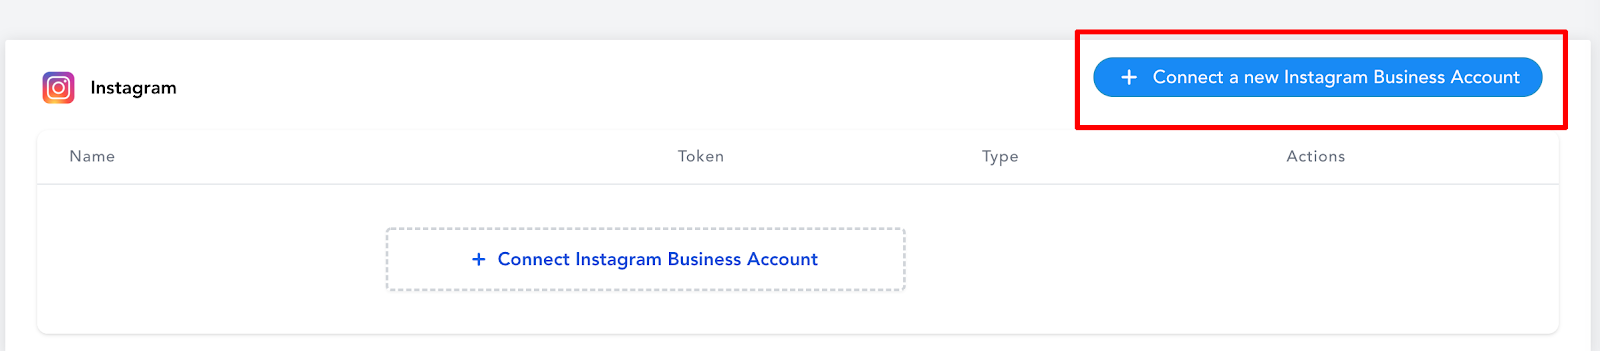
Step 2: After clicking Add account, there will be an option to add the Instagram Business Account
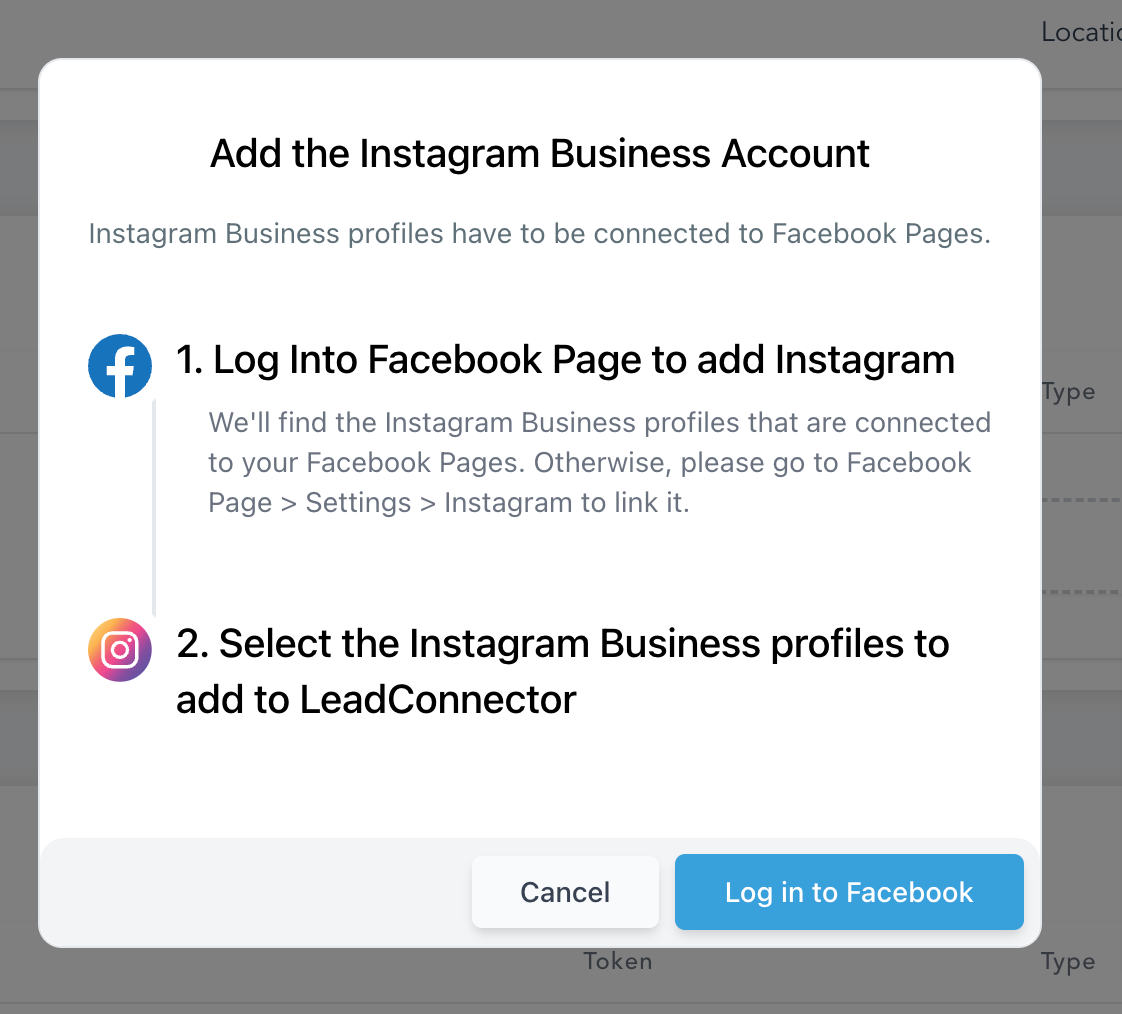
Step 3: It will ask you to choose Facebook and provide the permissions for Social Planner.
Use your Facebook account that has an Instagram Business account connected with it, type in the necessary details, and click on Log In.
Step 4: Next step is to select Instagram Business Profile(s), you wish to add to Social Planner
If the Instagram Business Profile is not verified it means that Instagram Business Account is not connected to any Facebook page. This is a requirement from Facebook to post.

Step 5: You can manage the accounts from the Setting Icon
How to connect to your Google My Business Location(s)
Google My Business is one of the most reliable platforms for marketers to manage the online presence of their business niche. It is the authentic way to acquire the trust of your audience by sharing your details to create a personalized relationship with them. This way the ultimate goal is to drive the audience to your businesses.
Step 1: Go to Social Planner > Setting
To get started, please go to Social Planner. In the top right corner of Social Planner, there is a Setting option (Gear icon). Please navigate to Settings by clicking it.

Step 2: Click on Connect a new Google My Business Location
The next step is to click on Connect a new Google My Business profile of the table as shown below to manage multiple GMB Locations.

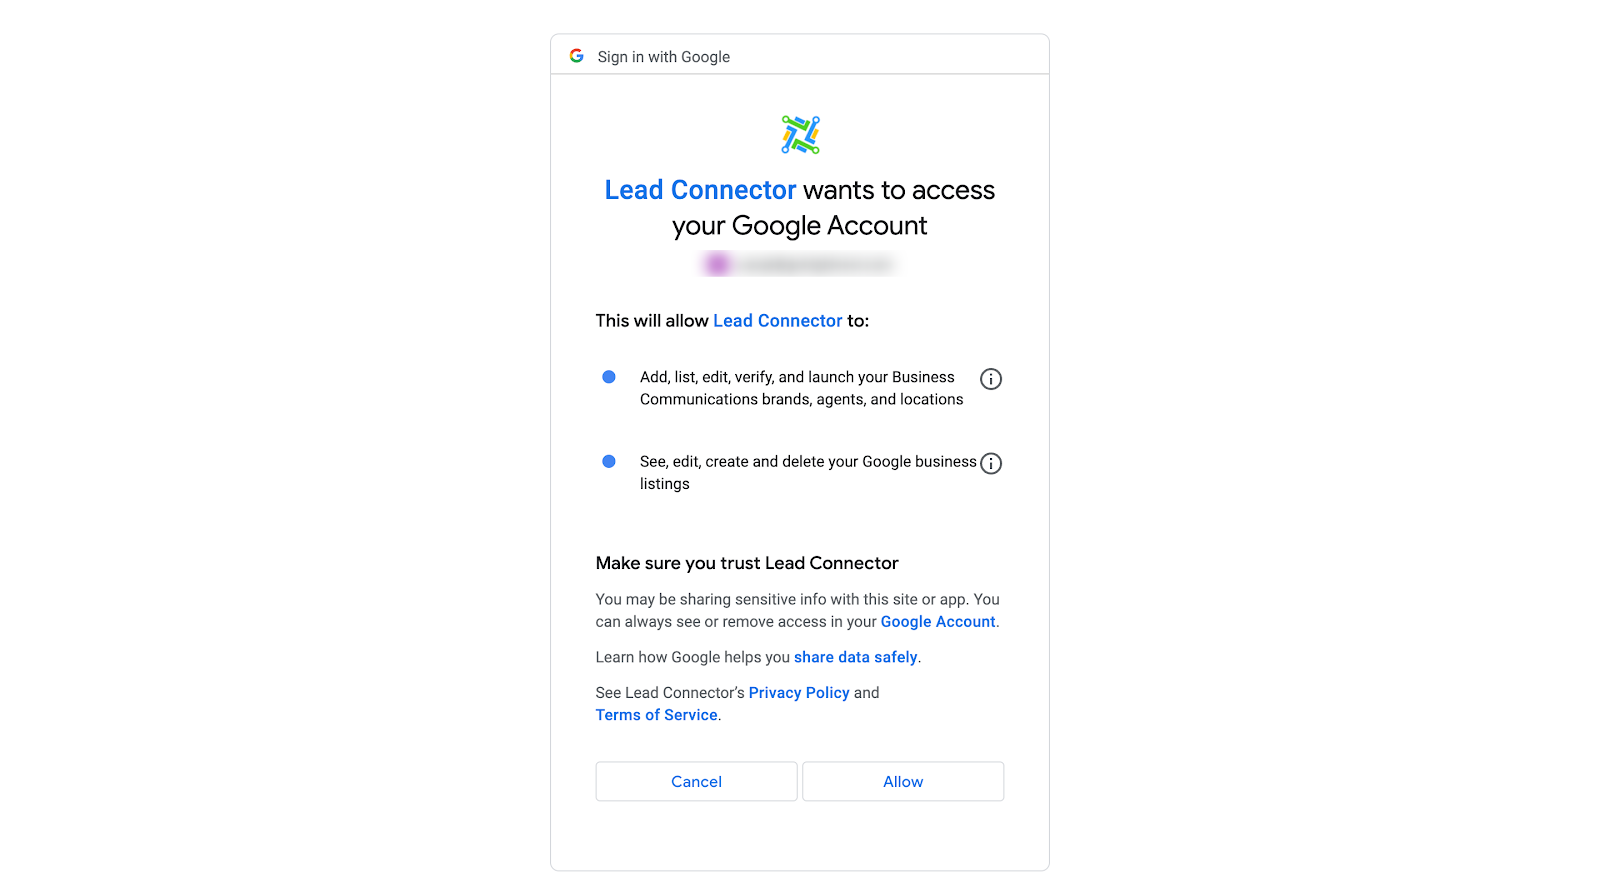
Step 3: Give permissions by choosing the Gmail Account
If you’re connecting any profile for the first time, they ask you to choose the Gmail account.

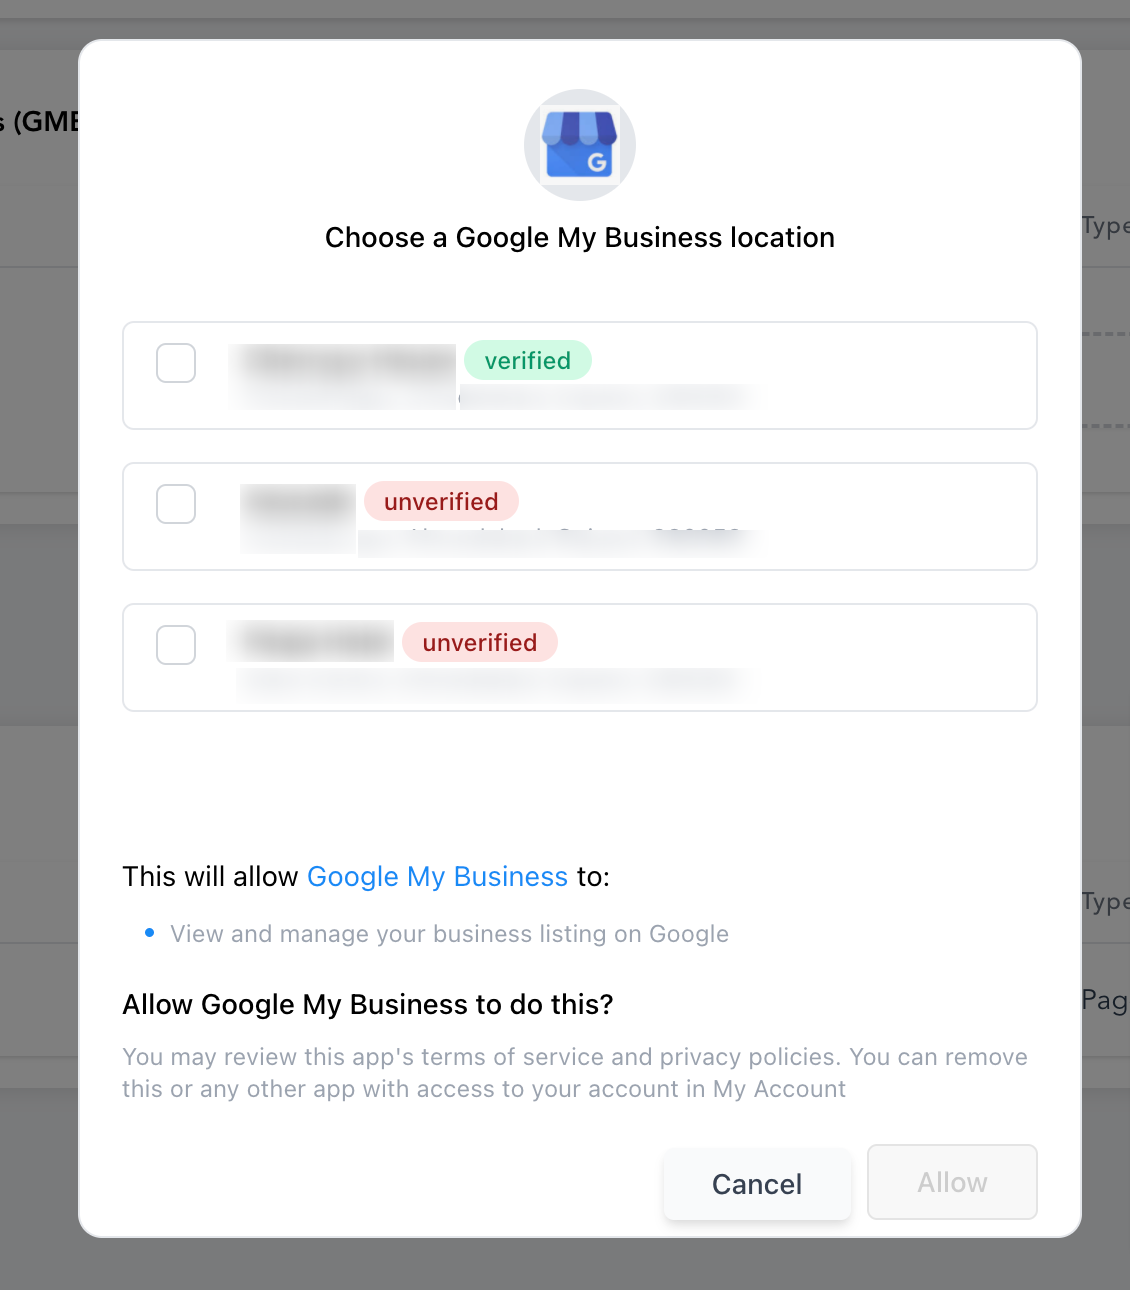
Step 4: Choose the GMB Locations for the Social Planner
Note:
1. If the GMB location is already added, it will show the message of the “location already added”.
2. If the GMB account has more than 10 locations, it will show an error that “This location belongs to a chain. The Local Post API is disabled for this location”.
How to connect to Twitter
Social Planner gives you the ability to add all your Twitter profile publish posts and engage with your audience through tweets and retweets (follow-up comments).
Step 1. Go to Social Planner > Setting
To get started, please go to Social Planner. In the top right corner of Social Planner, there is a Setting option (Gear icon). Please navigate to Settings by clicking it.

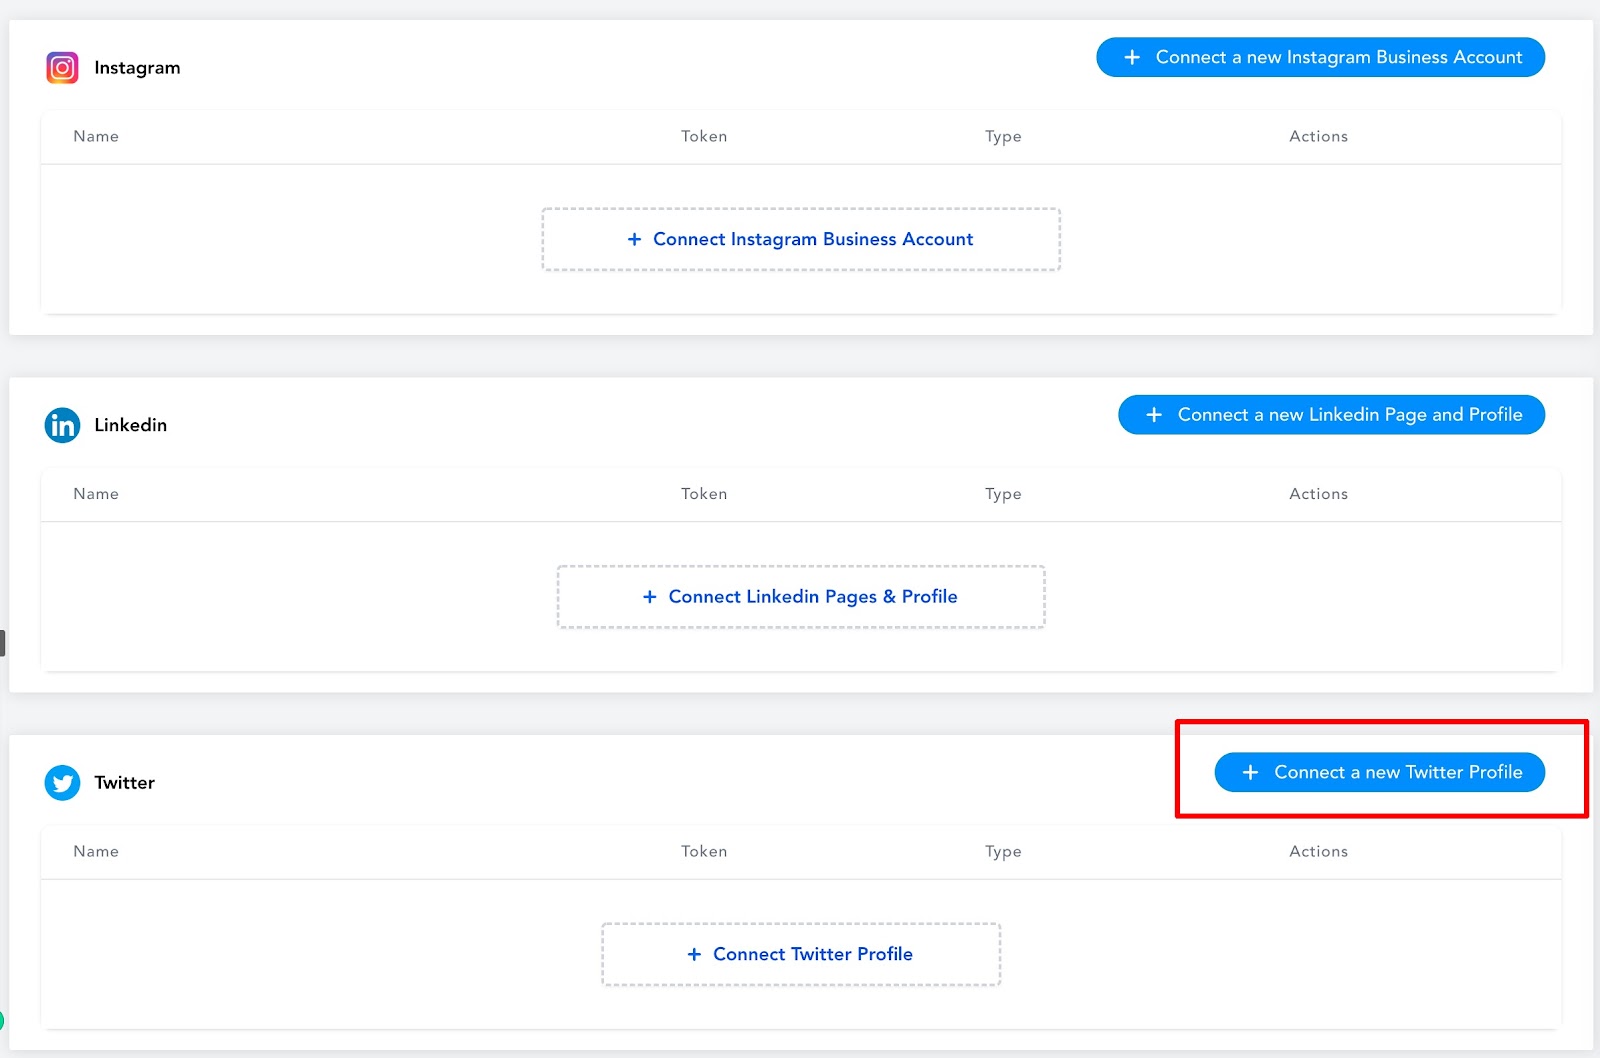
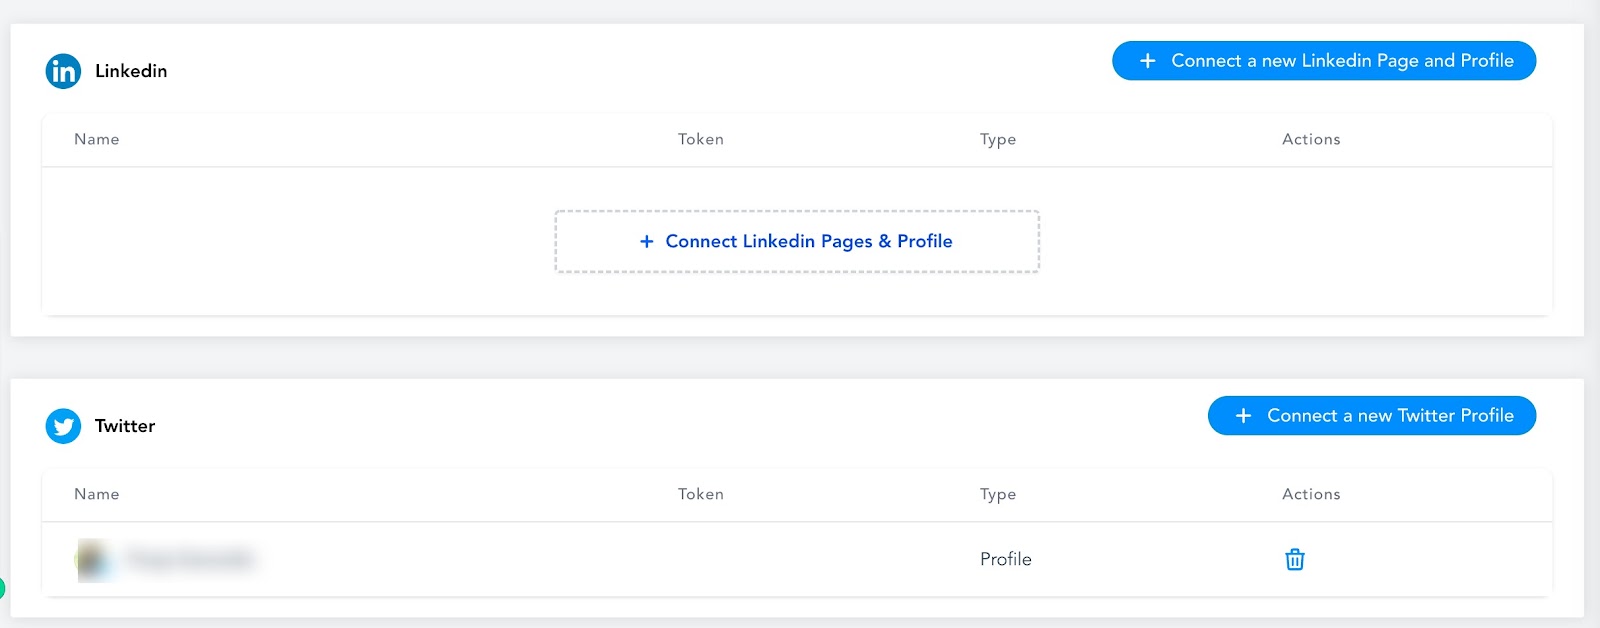
Step 2. Click on Connect a new Twitter Account
The next step is to click on connect a new Twitter Account of the table as shown below to manage.
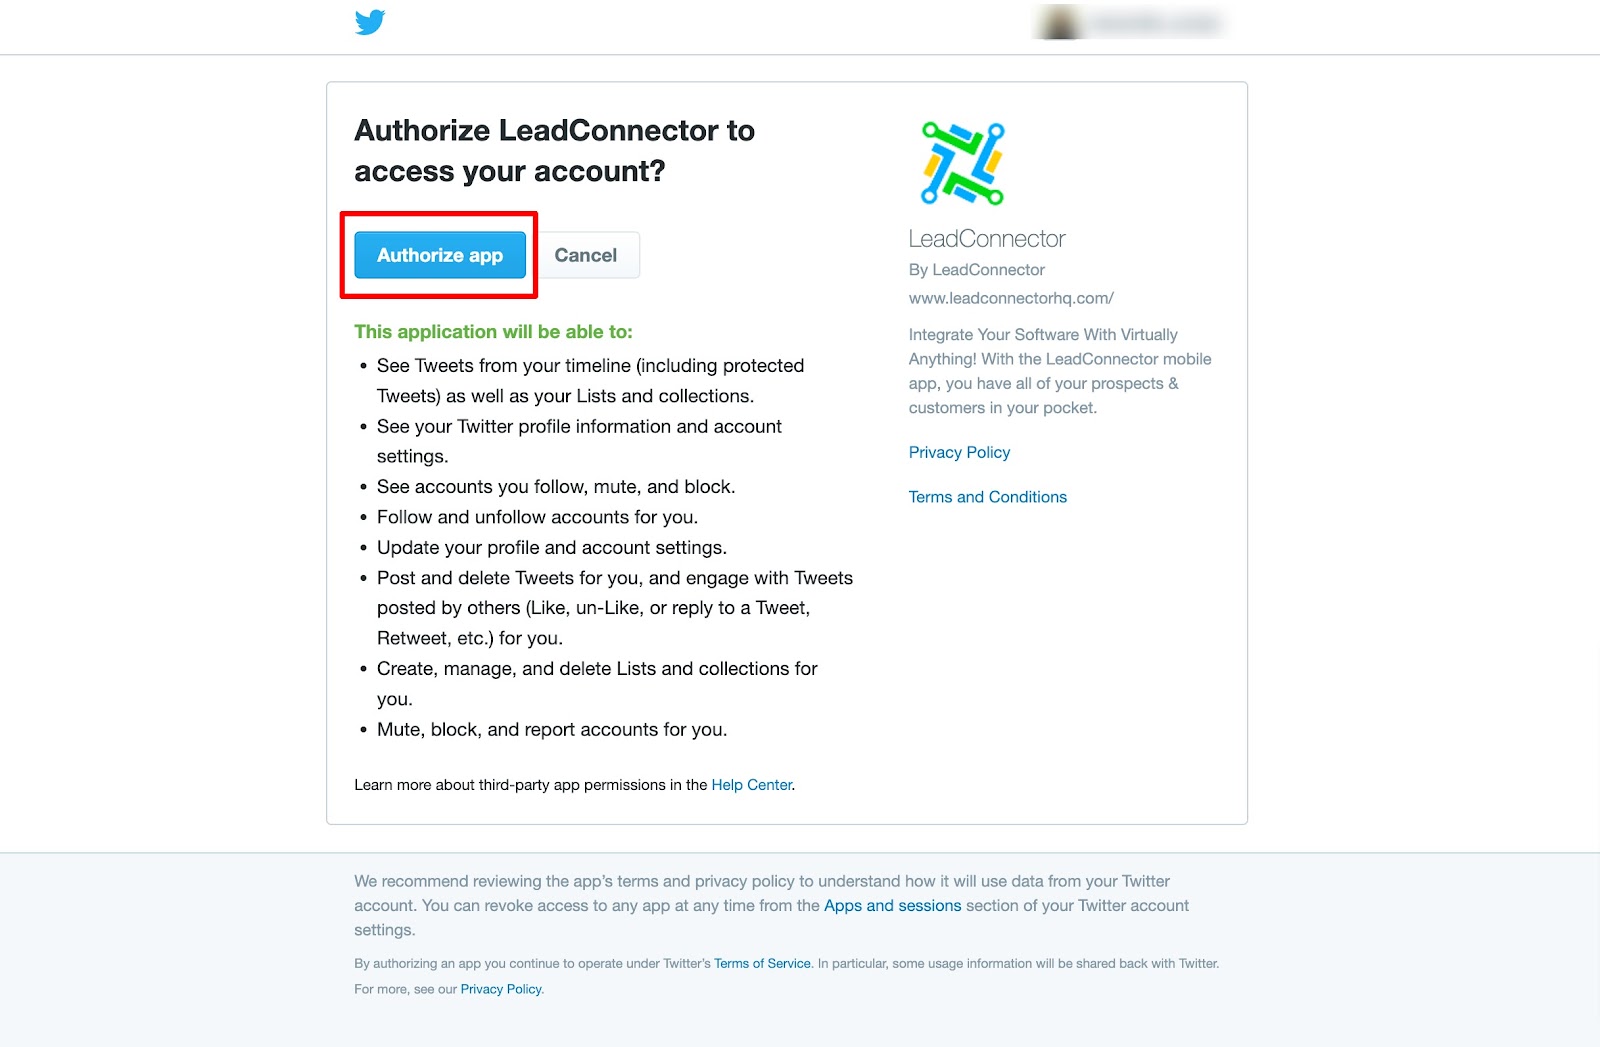
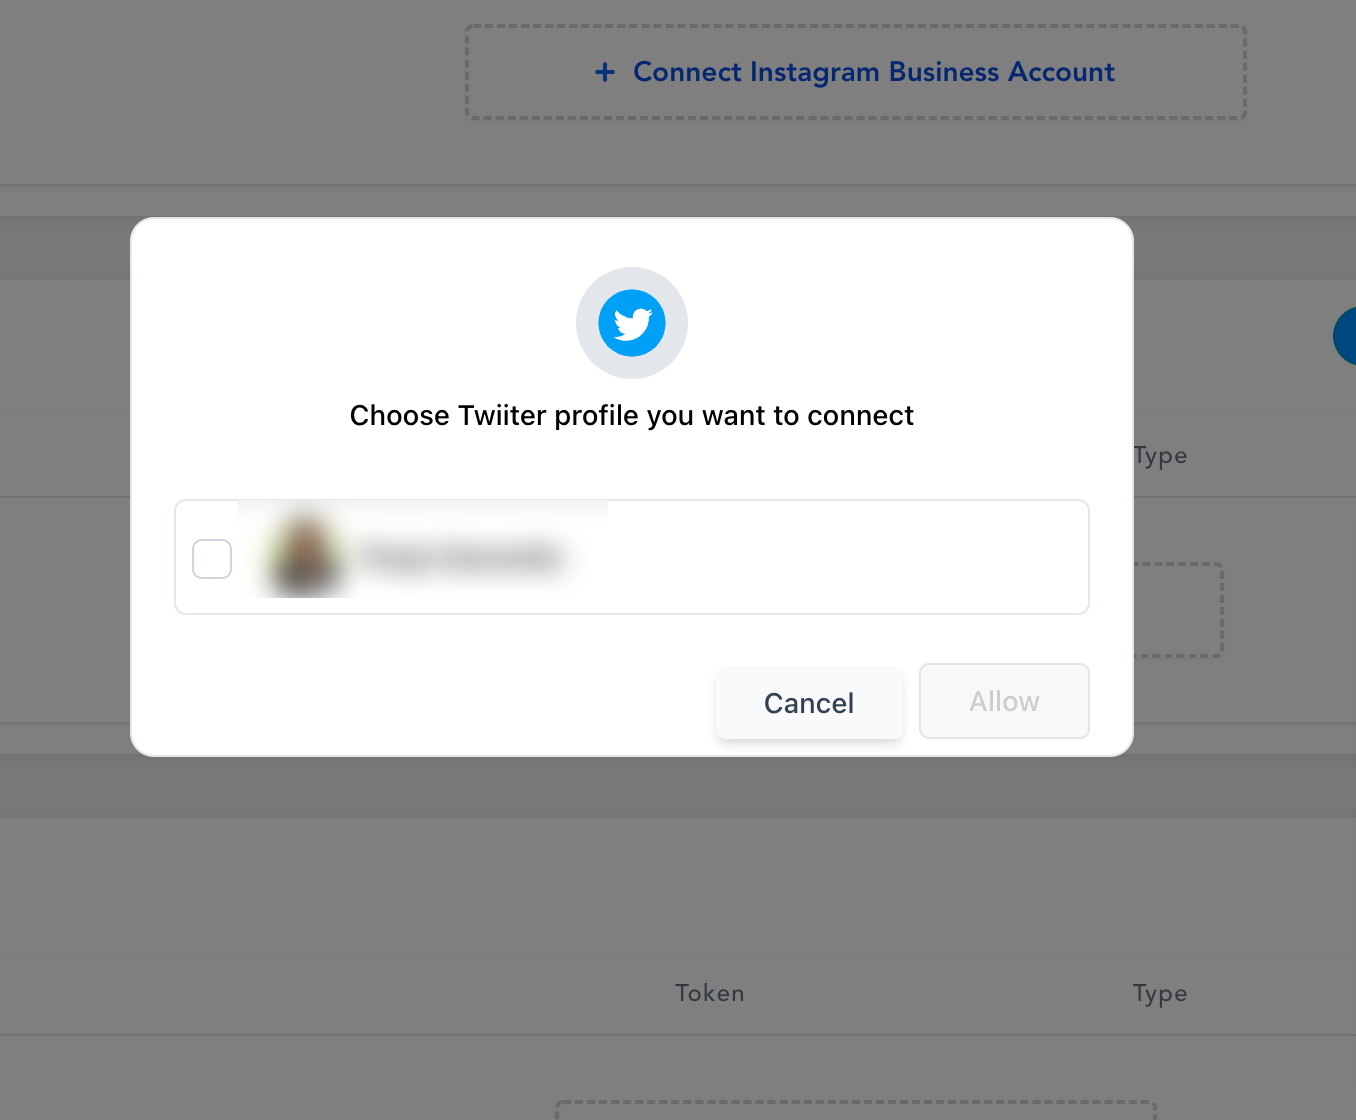
Step 3. Authorize Twitter Profile
Click on the Authorize App and your Twitter profile should be connected with ContentStudio.
Step 4. Verify your connection
Last but not least, all of the selected pages in the previous step will be listed down showing a successful connection; as shown in the image below.
Unable to reconnect a page/group in the Social Planner
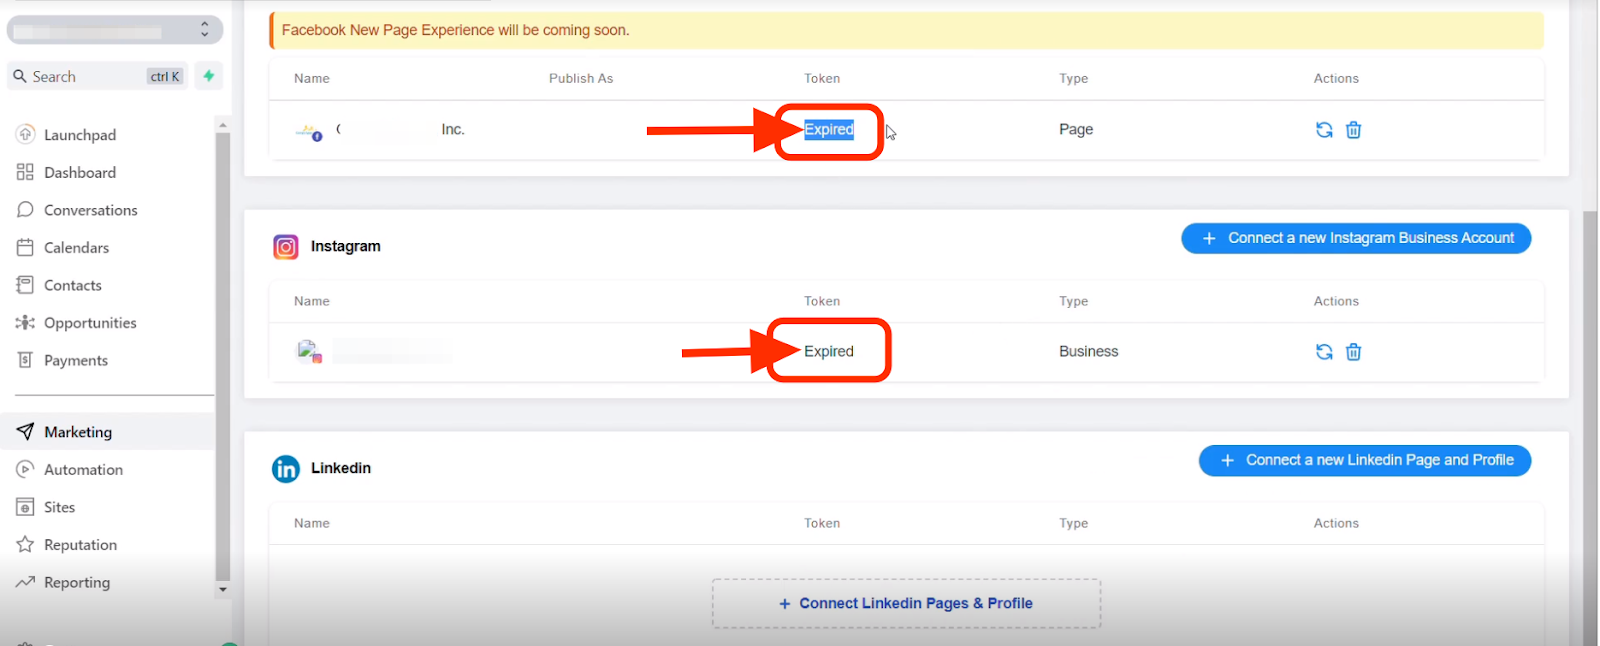
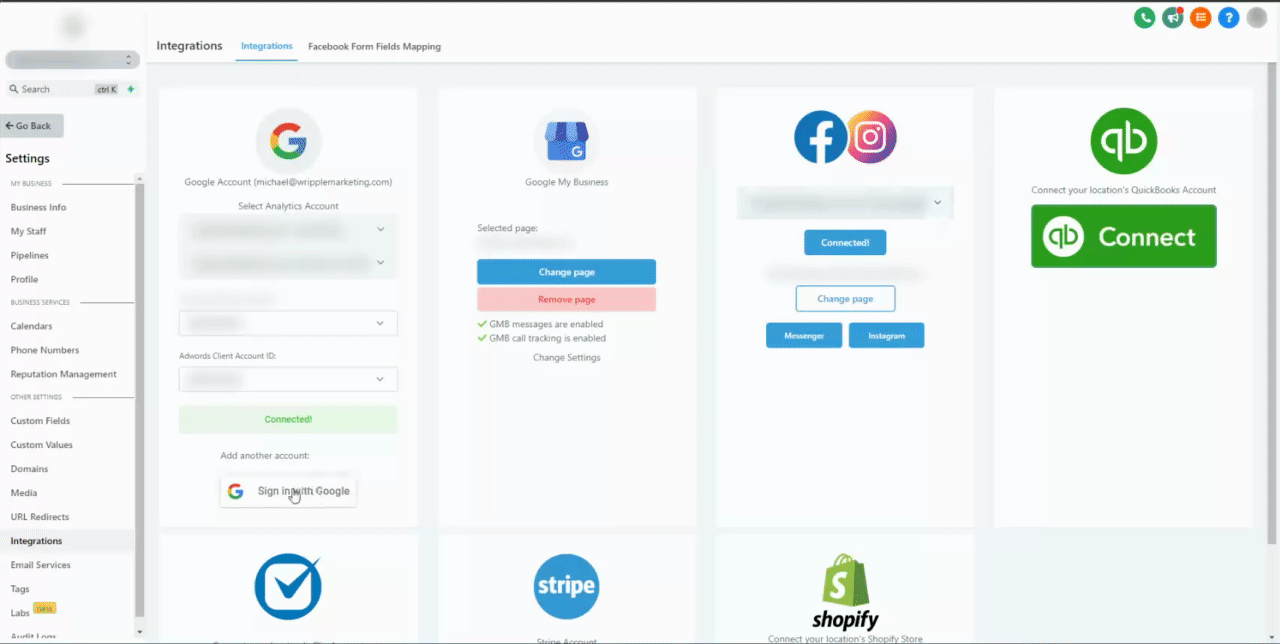
To reconnect a page/group within the social planner tab, please reconnect using the same User’s social media account that originally connected the page/group to the location or have the current user head into the locations Settings > Integrations > Click on disconnect, then the connect button for the accounts with expired tokens.
They will need to be a page admin to continue. Once done, head back into the social planner and check to see if the social token is still expired.
For example:
if Emily had connected the Facebook page using her account, now Alex (Account Admin) wants to reconnect the page because the integration has expired, then Alex will need to use Emily’s Facebook account to reconnect the page, or ask Emily to reconnect the page herself using her account within the locations settings > integrations > Disconnect, then reconnect Social pages where you are seeing expired tokens
When You’re Ready, Here’s How We Can Help:

Free Planner
Goals are important. If you want help reverse engineering your vision into bite-size goals and tasks — download The Power Planner for free.
Download Now

Free Challenge
Learn faster, train your creative muscle, and craft genius level ideas for your content, business, and life direction.
Join The Challenge

The 2 Hour Writer
Implement Our 2 Hour Content Ecosystem To Learn High Impact Digital Writing, Boost Your Online Authority, & Systemize Content Creation For Rapid Growth
Enroll in 2HW
Get started with WP-Propulsion
See how WP-Propulsion can help you with your needs.